
A simpler approach to a complicated topic.
As designers, it’s time we take charge of change.
We don’t need another discussion on why accessibility matters in product design. The reasons are well-established, from enhancing your design expertise and improving usability to creating a more inclusive world. What’s lacking is how we implement accessibility in a way that genuinely transforms user experiences. With this article, I hope that we can rethink how we approach accessibility specifications and make more impactful changes as designers.
Moving beyond the basics
Understanding how to interpret and apply WCAG guidelines is essential, but let’s be honest — it can get overwhelming. Although there are numerous courses and simplified guides available to help make sense of the documentation, it can often feel alienating and overcomplicated. As product designers, we already know how to provide a bridge between technology and the end user. We already design for various devices, browsers, and screen sizes, so our approach to accessibility needs to be practical and more actionable.
“Design is not just what it looks like and feels like. Design is how it works” ~ Steve Jobs
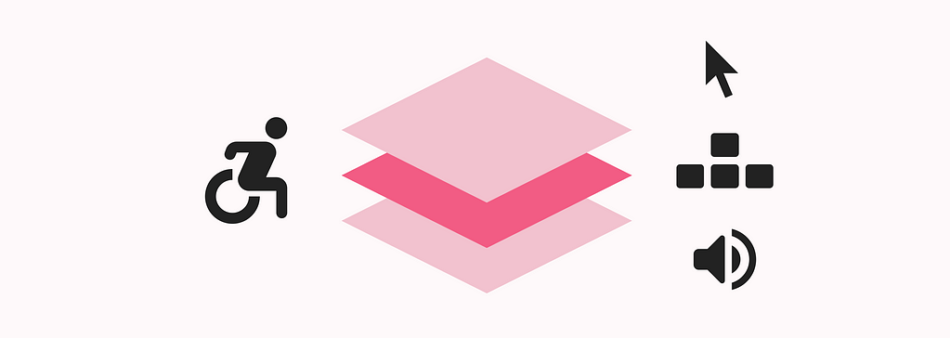
Building on a designer’s mindset, I propose a three-layered approach to accessibility design and specifications. Focusing on interactions and user flows, each layer targets specific elements that enhance the overall accessibility of a digital product.
The three layers of accessibility interactions
The following layers can be treated as separate user flows in your specifications, which supports assistive technology behaviour.
1. Keyboard user flow
Keyboard navigation is arguably the most critical layer because many assistive technologies, such as screen readers, rely on it. Denis Boudreau’s No Mouse Challenge dives deep into this topic, but here are the key design considerations you can add to your specifications.
Design considerations:
Ensure that every interactive element has a clear focus state.Avoid triggering events on focus — this should only happen with a purposeful user action.Follow the existing DOM structure to define a logical and consistent interaction order.Provide a “Skip to main content” link via the keyboard before the header.Avoid creating complex keyboard shortcuts, especially single-key shortcuts, and if you must, document them.Ensure any additional content triggered on focus (like tooltips) is persistent (they don’t disappear), hoverable, and dismissable (using the ESC key).Follow common input and component conventions; for example, when a modal closes, it should return focus to the original trigger. For more examples, see the W3C pattern library or Government Design Systems.
2. One-click user flow
Yes, you read that right — one single click. If there’s a zoom function via keyboard (Cmd & +) or a pinch gesture on a mobile device, a button should allow for the same action in one click. Similarly, drag-and-drop interactions can work with just two clicks — one to select and one to drop. This improves not only accessibility for assistive technologies like eye-tracking devices but also enhances usability on mobile devices.
Designer considerations:
Don’t rely on colour alone to communicate state changes, like hover.Meet contrast ratios for state changes (3:1 for visual cues).Ensure any additional content triggered by hover is persistent, hoverable, and dismissable.Avoid triggering actions on down events — use up events instead, to allow users to cancel interactions if needed.
3. Screen reader user flow
Designing for screen readers is often the most challenging aspect of accessibility because it’s not visual. Think of screen reader navigation as text-based navigation. Whereby users rely on clear, structured information to move through content. Remember that screen reader users can be some of the most advanced users when a site is designed with them in mind. Don’t underestimate the importance of well-structured elements like ‘headings’ and ‘regions.’ Instead of overloading with ARIA, rely on standard patterns and native HTML elements for better accessibility.
Designer considerations:
Define the name (What is its purpose?), role (What function does it perform?), and value (What’s its state?) for each interactive element.Provide clear instructions and labels for all inputs.Ensure error messages are descriptive and useful.Visual cues with a functional purpose must have text alternatives. Else it needs to be hidden.Make sure all status messages or changes are announced.The label for an input should match the name of the element.Headings and labels should accurately describe the topic or purpose.Avoid vague link labels like “Click here”; instead, make the purpose of the link clear through its label and context.
Beyond compliance: Accessibility as a core practice
Accessibility is not just about meeting guidelines — it’s about making thoughtful, inclusive design choices.
Here are a few more best practices to integrate into your workflow:
Designer considerations:
Avoid using colour alone to communicate key information (status, links, etc.).Ensure all elements meet the required contrast ratios (3:1 for symbols, 4.5:1 for text).Make interactive areas at least 24px, but aim for 44px.Include validation states for form inputs or offer a review step.Help functions should be easily accessible and consistently placed across the UI.Maintain consistent labels and navigation across the experience.Allow users multiple ways to complete key tasks, whenever possible.Avoid flashing elements that blink more than three times per second, or keep them small — like a notification.Don’t autoplay anything unless necessary; keep it under five seconds and provide clear controls to pause, stop, or hide it.Allow users to extend or adjust time limits on tasks.When testing, ensure the design works when zoomed in up to 400%.Design for scalability — avoid scrolling in two directions (horizontal & vertical) and support both orientations (landscape & portrait).A good minimum font size is at least 16px with a line height of 150%.
Other developer considerations:
Language should be explicitly defined, for example with a language attribute in the HTML element.Adjust the language attribute contextually if it changes, such as when Latin names are used.Every web page should have a meaningful title that describes its purpose.“Every design decision has the potential to include or exclude people” ~ Alistair Duggin
Conclusion
As Lucia Liu said, “The only real tool for finding solutions is empathy.” With practical knowledge and action, we can transform how we approach accessibility in design. By embedding it into every decision, we can create digital experiences that are intuitive, inclusive, and empowering for all users.
To help you on this journey, see this free Figma template demonstrating the three-layered approach to accessibility specifications.
Together, we can move from awareness to action, making accessibility more than a checklist — rather a transformative part of the design process. Let’s be the change that sets a new standard for inclusive, thoughtful design.
Further reading:
Nielsen Normans: Study guide to inclusive designStéphanie Walter: Guide to Documenting Accessibility & User InteractionsYichen Hes: Overview of the Web Accessibility StandardsPrinceton: Guide to designing for digital accessibility
Useful Figma resources:
The WCAG plugin for quick guidelines lookupStark plugin for some automated and manual testsIBM accessibility specification template
Thank you for reading! As life is a continuous learning journey, please feel free to reach out with your feedback or any questions you may have 
A three-layered approach to accessibility design was originally published in UX Collective on Medium, where people are continuing the conversation by highlighting and responding to this story.


